Quickstart Guide
Six steps: create an account, add your domain, copy the DMARC record DDMARC generates for it, publish that record in DNS, run a DNS check, and wait for the first reports.
Before you begin
- • Permission to edit your domain's DNS (Cloudflare, Route 53, GoDaddy, and so on)
- • An email address you can open right away — sign in with an emailed link or code, a passkey, or your Google account or Microsoft work or school account
- • About 5 minutes, plus usually 24 hours of waiting for the first reports, sometimes 48
Not signed up yet and just want to see where your domain stands? Run the free DMARC checker first — no account needed.
Create your account
Sign up with your work email. Monitor is free (2 domains, no card). Protect, Growth and Professional start with a 14-day trial, so you can switch on scheduled DNS monitoring, forensic reports and alert rules from day one and decide later.
Sign in with an emailed link or one-time code, a passkey, or your Google account or Microsoft work or school account — whichever you pick lands you in the dashboard.
Monitor (free) includes: 2 domains, 30 days of report retention, manual DNS checks, and email report digests.
Scheduled DNS monitoring, forensic (RUF) reports, TLS-RPT and custom alert rules start at Protect. Managed MTA-STS and BIMI hosting start at Growth. See the plan comparison.
What you should see
The dashboard opens on an empty overview with a prompt to add your first domain.
Add your domain
Go to Domains and click Add Domain. There is a single field labeled Domain — enter the domain that appears in the From address of your email, for example example.com. Do not include www. or a protocol.
What you should see
DDMARC creates the domain, takes you straight to its detail page, and runs a first DNS check automatically. Until a DMARC record exists the domain shows as Pending setup — that is expected at this point.
Copy the DMARC record generated for your domain
On the domain page, open the DNS & Setup tab. The DNS configuration card shows the exact DMARC record for this domain, ready to copy.
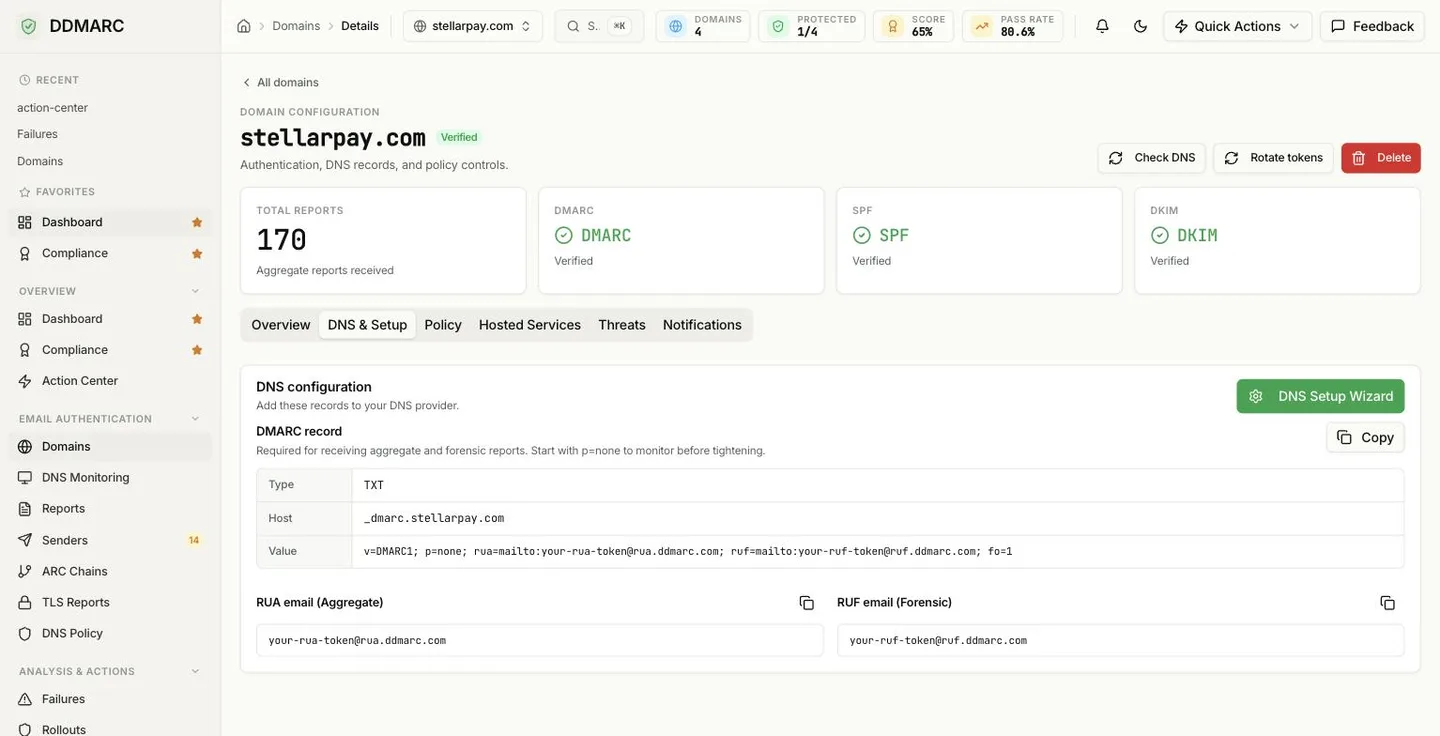
Your reporting addresses are unique to your domain
DDMARC mints a random token per domain and builds the reporting mailboxes from it. The address looks like your-rua-token@rua.ddmarc.com. When a report arrives, DDMARC reads that token to work out which domain the report belongs to.
Always copy the record from the dashboard. A record typed from an example in these docs points at a mailbox that matches no domain, and the reports are dropped — you would wait weeks and see nothing.
The record follows this shape, with your own tokens in place of the placeholders:
Host: _dmarc.example.com
Type: TXT
Value: v=DMARC1; p=none; rua=mailto:your-rua-token@rua.ddmarc.com; ruf=mailto:your-ruf-token@ruf.ddmarc.com; fo=1
Record breakdown
v=DMARC1— DMARC versionp=none— policy: monitor onlyrua=— where aggregate reports goruf=— where forensic reports go (Protect and above)fo=1— request a forensic report on any failure
Start at p=none
p=none changes nothing about how your mail is delivered — it only turns on reporting. Move to p=quarantine and then p=reject once the reports show every legitimate sender passing. The DMARC setup guide covers that path.
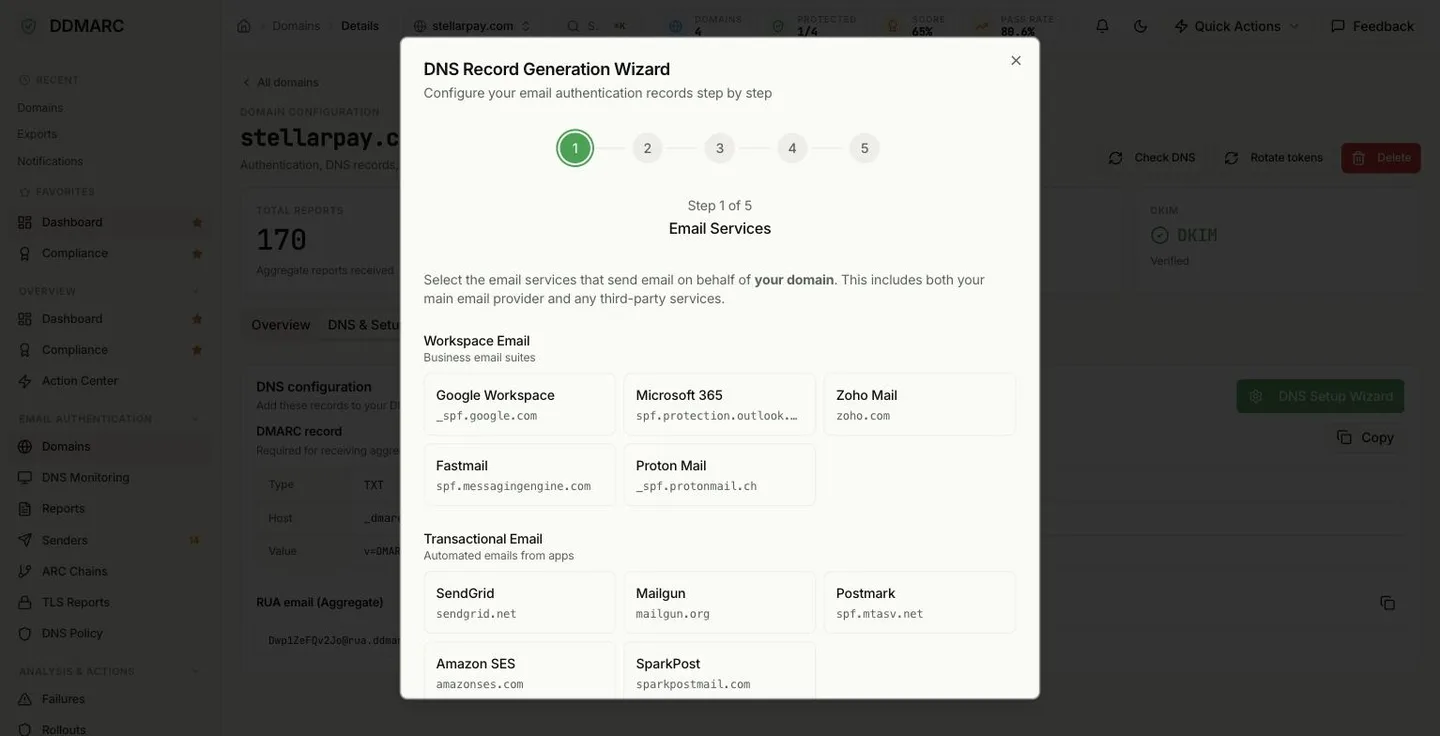
Prefer to be walked through it? Use the DNS Setup Wizard
The DNS Setup Wizard button sits at the top of the same DNS & Setup card. It walks through five steps — Email Services, SPF, DKIM, DMARC, Review — and hands you every record at the end, with a button to re-check DNS once you have published them. If you are setting up SPF and DKIM at the same time as DMARC, start here instead.
What you should see
You have the full DMARC record for your domain on the clipboard, containing two @rua.ddmarc.com / @ruf.ddmarc.com addresses that belong to this domain only.
Publish the record in DNS
In your DNS provider, create a TXT record:
- Name / host:
_dmarc— most providers append your domain automatically, so you get_dmarc.example.com. - Type:
TXT - Value: the record you copied in step 3, pasted whole. Do not wrap it, split it, or add quotes your provider did not ask for.
- TTL: leave the default (or 3600 if you must choose).
If a DMARC record already exists at _dmarc, replace it. A domain must have exactly one DMARC record — two records make the policy invalid and receivers ignore both.
What you should see
The provider saves the record without a syntax error. Propagation is usually seconds to minutes, though it can take up to 24 hours.
Run Check DNS
Back on the domain page, click Check DNS in the top-right. DDMARC queries your live DNS and reports what it found for DMARC, SPF and DKIM.
There is no separate "verify domain" step to hunt for: your domain verifies itself automatically when the first DMARC report arrives. If you would rather not wait, the Awaiting first report card offers an optional ownership TXT record — publish it and click Verify now to confirm immediately.
If Check DNS still says no DMARC record
- • Give DNS a few more minutes and check again.
- • Confirm the host is
_dmarcand not_dmarc.example.com.example.com(a duplicated suffix is the most common mistake). - • Confirm the record type is TXT, not CNAME.
- • Confirm there is only one DMARC record on the domain.
What you should see
The DMARC row turns green with the record DDMARC read back from DNS, and the domain badge moves from Pending setup once the first report lands.
Wait for the first reports
Gmail, Microsoft, Yahoo and the other large receivers batch their aggregate reports and send them roughly once a day. Expect the first data in your dashboard usually within 24 hours, sometimes 48, of the record going live. Nothing is broken before then — there is simply no report to show yet.
While you wait
- • Already have DMARC reports in a mailbox? Upload Report on the Dashboard page loads them now instead of waiting.
- • Run the DNS Setup Wizard from step 4 for SPF and DKIM, so the first reports arrive against a record that is already aligned.
- • Connect Slack so alerts reach the channel your team already reads (Protect and above, included in the trial).
- • Invite a teammate to share the domain (Growth and above).
What you should see
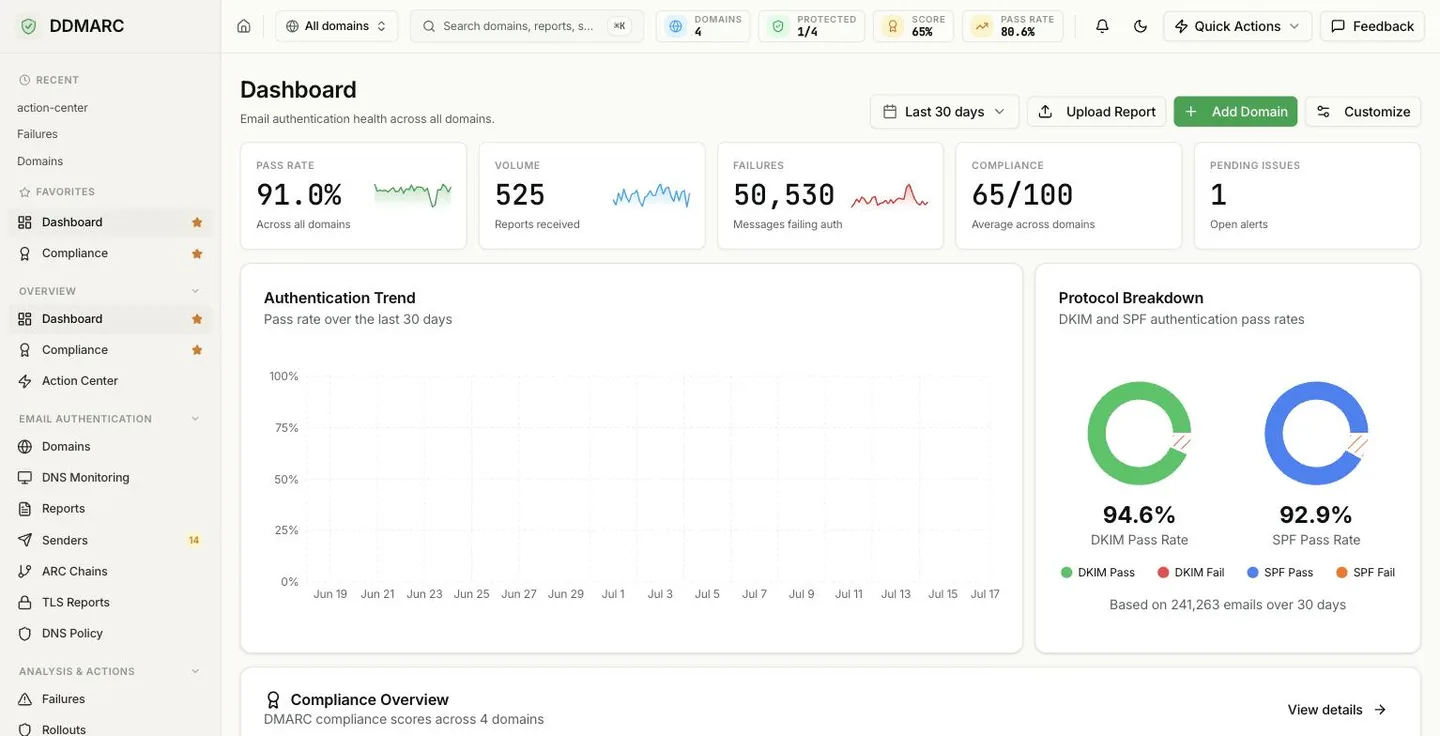
Reports appear under Reports, and the senders using your domain are listed under Senders with their SPF and DKIM alignment.
If you ever need to change your reporting addresses
The domain page has a Rotate tokens action. It issues new RUA and RUF tokens and emails you the new record. The previous addresses stop resolving to your domain the moment you rotate, so update the _dmarc TXT record in DNS straight away — any report sent to the old mailbox in the meantime is lost.
You're all set
DMARC monitoring is live. Usually within 24 hours, sometimes 48, you will see who sends email using your domain, and which of those sources pass authentication — the data you need before tightening the policy to p=quarantine and then p=reject.